What is jsRPC
RPC stands for Remote Procedure Call, a concept familiar to many within the realm of applications (APP).
So, what is jsRPC? As the name suggests, jsRPC refers to the use of JavaScript to remotely control the browser console, typically requiring the implementation of WebSockets.
Now, let’s start by creating a simple example:
var ws = require('nodejs-websocket');
console.log('开始建立连接...');

var cached = {}

var server = ws.createServer(function (conn) {
  conn.on('text', function (msg) {
    var key = conn.key
    console.log("将要发送代码:【" + msg + "】至浏览器/python");
    server.connections.forEach(conn => {
      conn.send(msg);
    })
  })
  conn.on('close', function (code, reason) {
    console.log('关闭连接', code, reason)
  });
  conn.on('error', function (code, reason) {
    console.log('异常关闭', code, reason)
  });
}).listen(8015)
console.log('WebSocket建立完毕');
Inject into the browser:
(function () {
    if (window.WebSocket) {
        ws = new WebSocket("ws://localhost:8015");
        ws.onopen = function (e) {
        };
        ws.onclose = function (e) {
            console.log("server closed", e)
        }
        ws.onerror = function (e) {
            "connection error"
        }
        ws.onmessage = function (e) {
            console.log(e)
        }
    }
})()
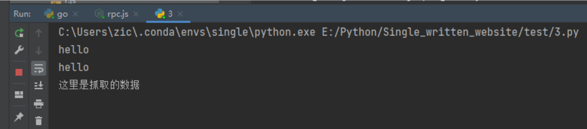
In the browser, perform operations on it, such as sending data.
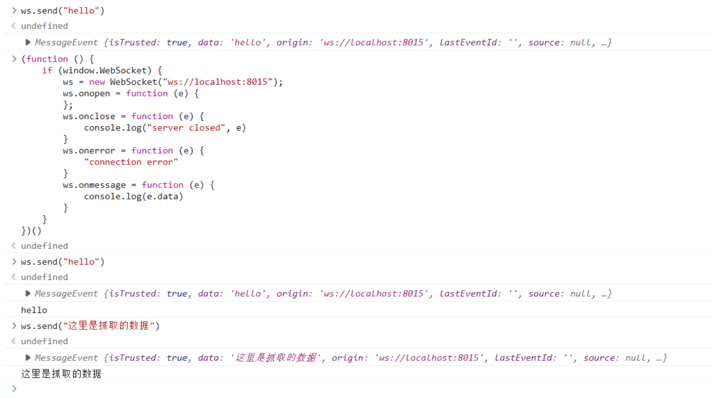
This data can be received in Python code.
jsRPC Application based on Sekiro
Introduction: Sekiro is an Android private API exposure framework based on long connections and code injection.
- GitHub: https://github.com/virjar/sekiro
- Sekiro is implemented in a web environment based on WebSocket. This functionality supports injecting JavaScript into the browser and calling JavaScript code within the browser environment.
- Documentation: https://sekiro.iinti.cn/sekiro-doc/01_manual/1.quickstart.html
The official documentation provides “Docker-based installation” and “manual installation”. This article mainly focuses on manual installation.
- Download the installation package https://oss.iinti.cn/sekiro/SekiroMain.zip
- Configuration and initialization: Unzip the installation package
- Database configuration and initialization are in:
assets/ddl.sql. Please create database tables based on this SQL file. - Relevant configurations in the
conffolder: The project uses Spring Boot. Optional project configurations are inconf/application.properties. Configure your database connection information here (the database should be configured and initialized as per the previous step).conf/static/*contains frontend resources. If you want to change the frontend web page theme, you can replace the content here. Sekiro’s frontend is open source and supports secondary development.conf/static/sekiro-doc/*contains document resources. If you want to modify the document content, you can edit it here.
- Database configuration and initialization are in:
- Running
- Execute
bin/startup.sh(for Windows, executexxx.bat) - Observe if the logs are normal
- Execute
Usage:
Inject the js file sekiroWebMini.js into the browser environment, and then access your browser service through the current interface.
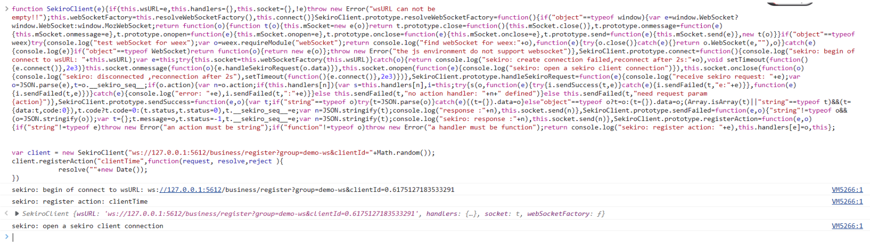
Then inject the following code:
var client = new SekiroClient("ws://127.0.0.1:5612/business/register?group=demo-ws&clientId="+Math.random());
client.registerAction("clientTime",function(request, resolve,reject ){
            resolve(""+new Date());
})
After injection, use your browser to access http://127.0.0.1:5612/business/invoke?group=demo-ws&action=clientTime
Upon successful execution, it should appear as follows:
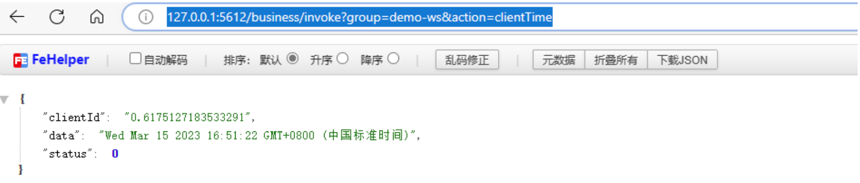
Here, the returned value is the code resolve(""+new Date());, indicating that any operation can be performed.
Understanding Sekiro jsRPC
It provides a feasible theoretical approach for interaction between the browser, code, and interfaces. In theory, any website can use this method to overcome anti-crawling restrictions at the JavaScript level, and its stability surpasses all current automation frameworks.
Usage Description:
- Exposing interfaces for decryption functions
- Exposing interfaces for data interfaces
- Exposing interfaces for automated collection
- Anything else you can think of…
Advantages
- Compared to traditional automation frameworks, it offers higher stability and does not require consideration of browser fingerprints. With proper operation, the performance is not in the same order of magnitude.
- It can directly obtain encrypted parameters through JavaScript, providing an excellent experience for exposing global variable parameters.
- It can directly obtain interface data, providing an excellent experience for websites with obvious data interface exposure.
- Without considering risk control, it can achieve high concurrency.
This article is from: https://blog.csdn.net/Zuko_chen/article/details/129578028